The Mathboard Project
Finally cutting vegetables with sub-millimeter precision: an Ikea cutting board gets an upgrade
A typical problem in German kitchens: you're preparing a great meal, but unfortunately cutting the vegetables fails due to the cutting board's lack of precision. How are you supposed to chop an onion if a standard deviation of ± 50 μm can't be achieved?
But jokes aside, you can never have enough cutting boards in the kitchen - so why not have one that brings a scientific touch to the cooking process as well.
So I came up with ideas and initial sketches of what such a cutting board should look like. In the process, I came across the High-Precision Cutting Board from GetDigital, who had pursued a similar idea with their product. What bothered me about that design, however, was that the board was a) comparatively small and b) offered no diagonals.
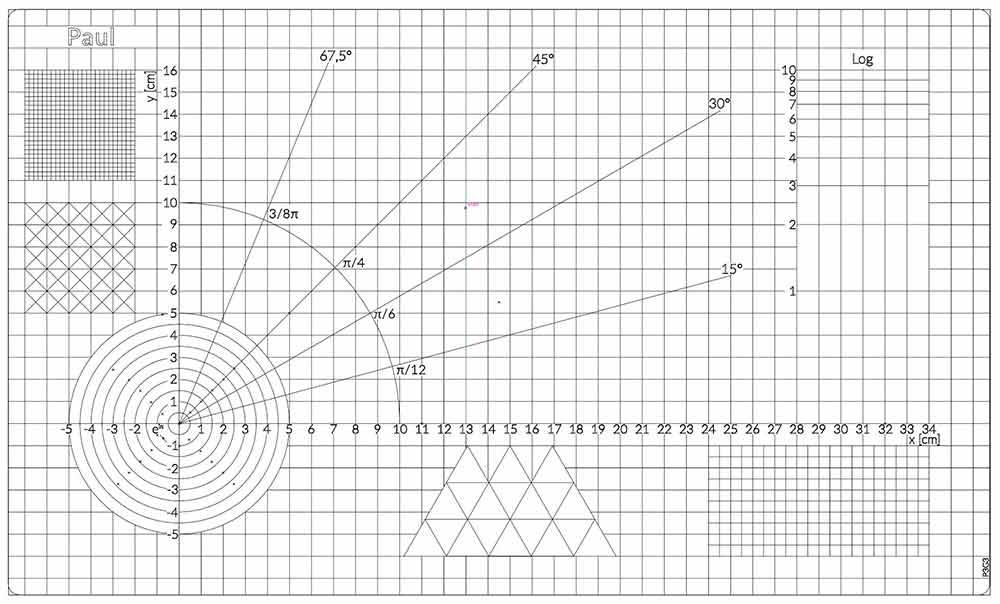
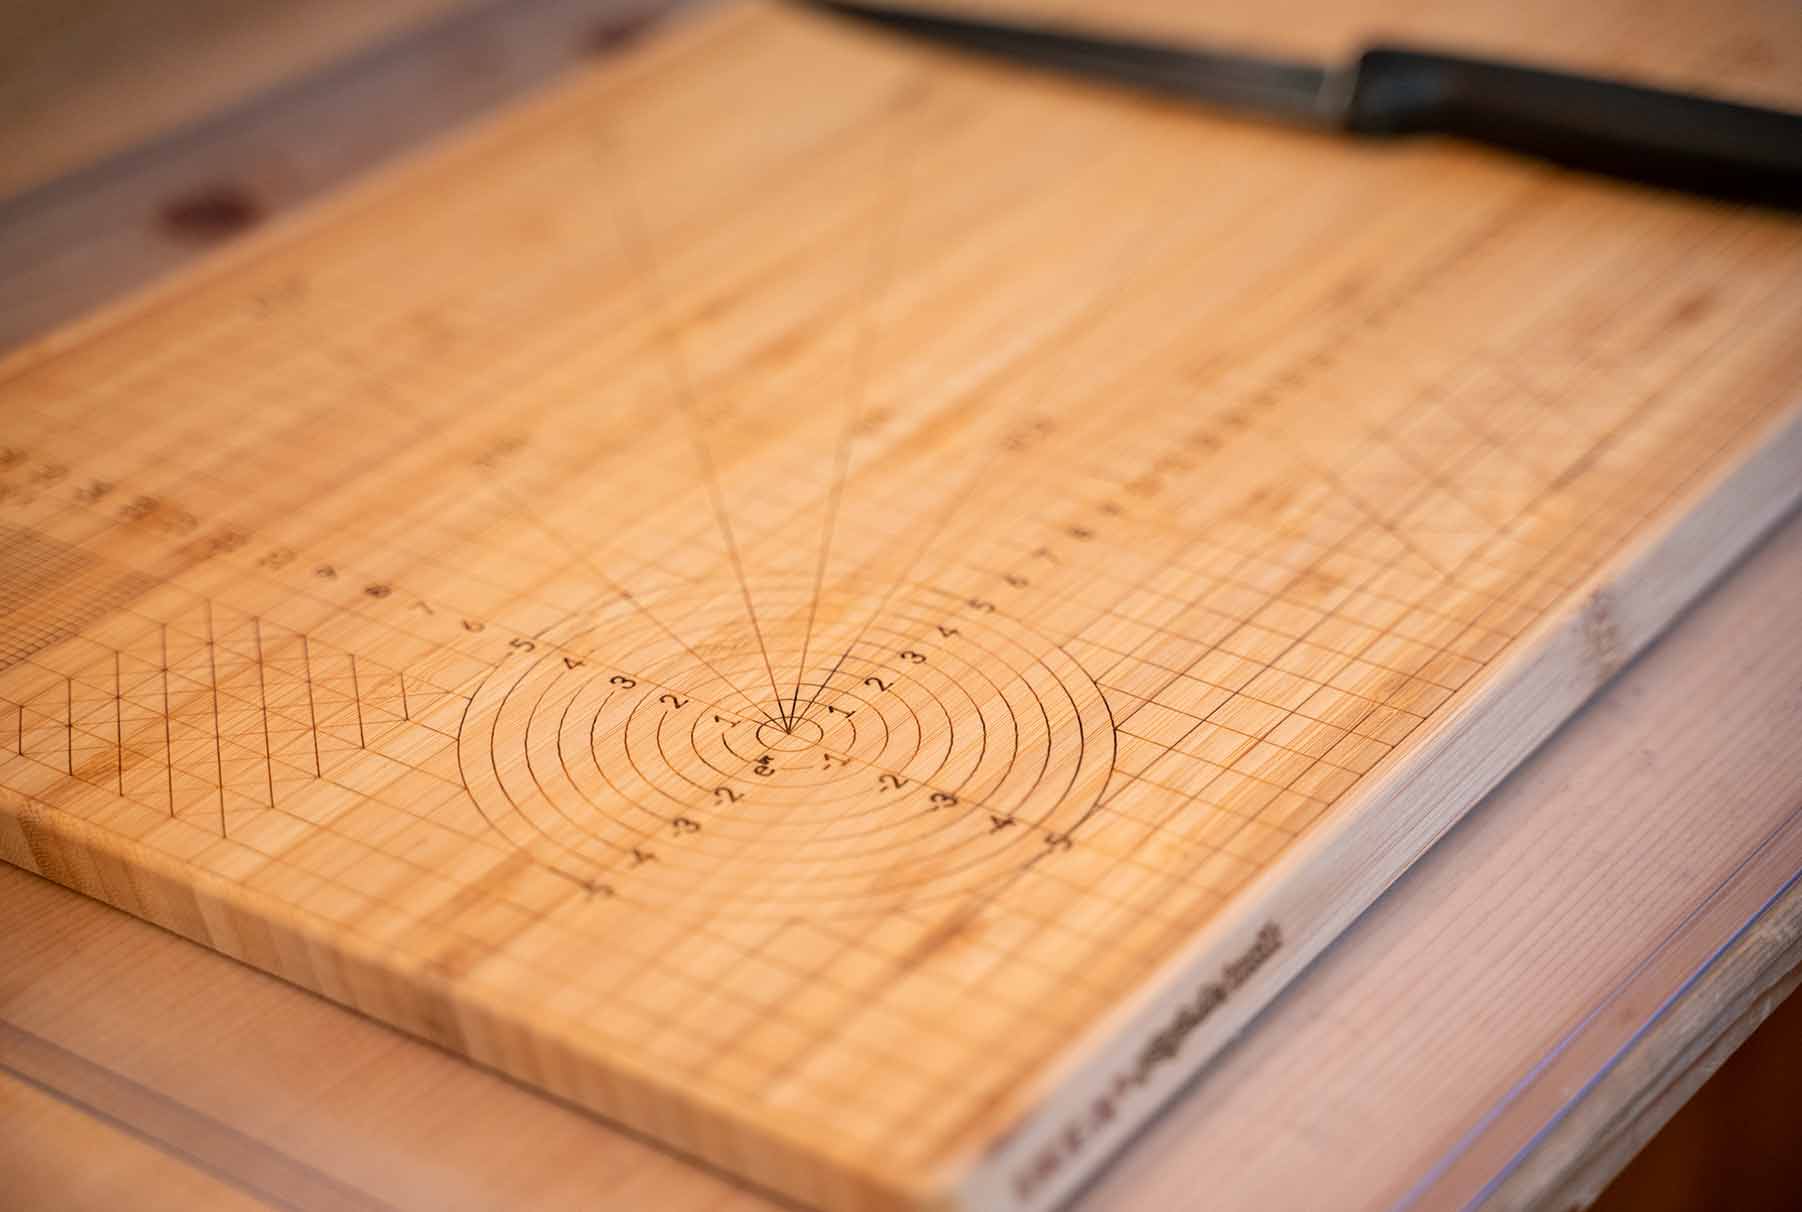
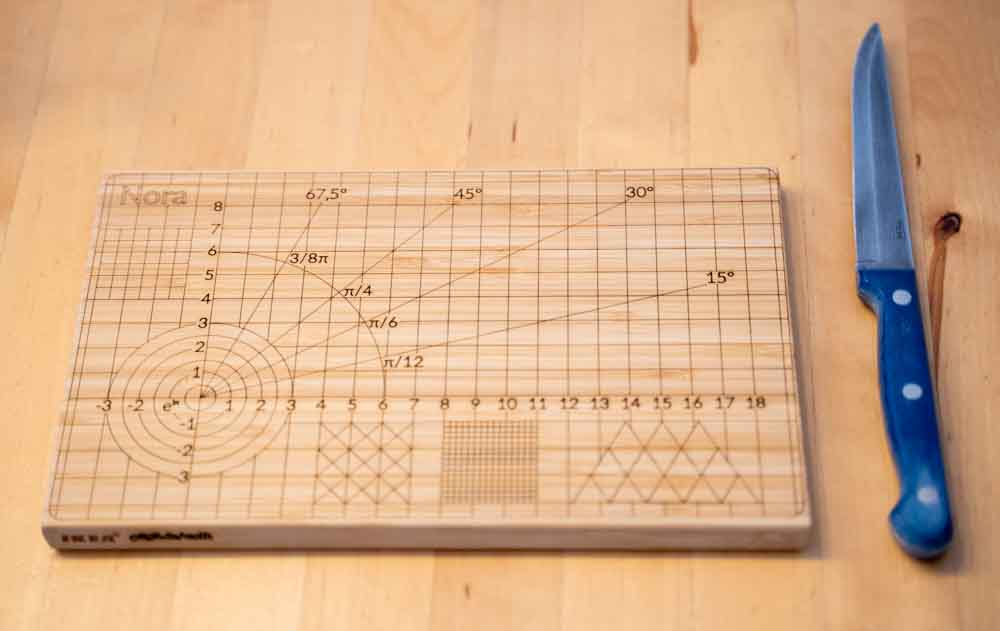
That's why I started completely from scratch to develop my own version. As a basis, I used an Aptitlig cutting board from Ikea, which is quite large at 45x28 cm and still affordable at under 8 euros each. The fact that the cutting board is made of bamboo is also very helpful: bamboo is a light-colored wood that can be worked well with a laser cutter.
So I bought a few of these cutting boards at Ikea for testing, then spent a few hours in the vector graphics program Adobe Illustrator drawing the design of the boards. At the same time, I brushed up on my middle-school math again, since in several places I had to calculate trigonometric relationships. The triangles in the lower middle gave me a particularly hard time: in Adobe Illustrator, triangles are defined by height * width - so for isosceles triangles, it's not enough to simply set the height equal to the width. But that problem could be solved too, and after that only the logarithmic distances remained to be calculated; with the help of a calculator, these distances could be entered into Illustrator accurate to five decimal places.
At the moment, I'm waiting to get around to laser-cutting the project - an update will follow in this post over the next few weeks.
//Update, May 24, 2021:
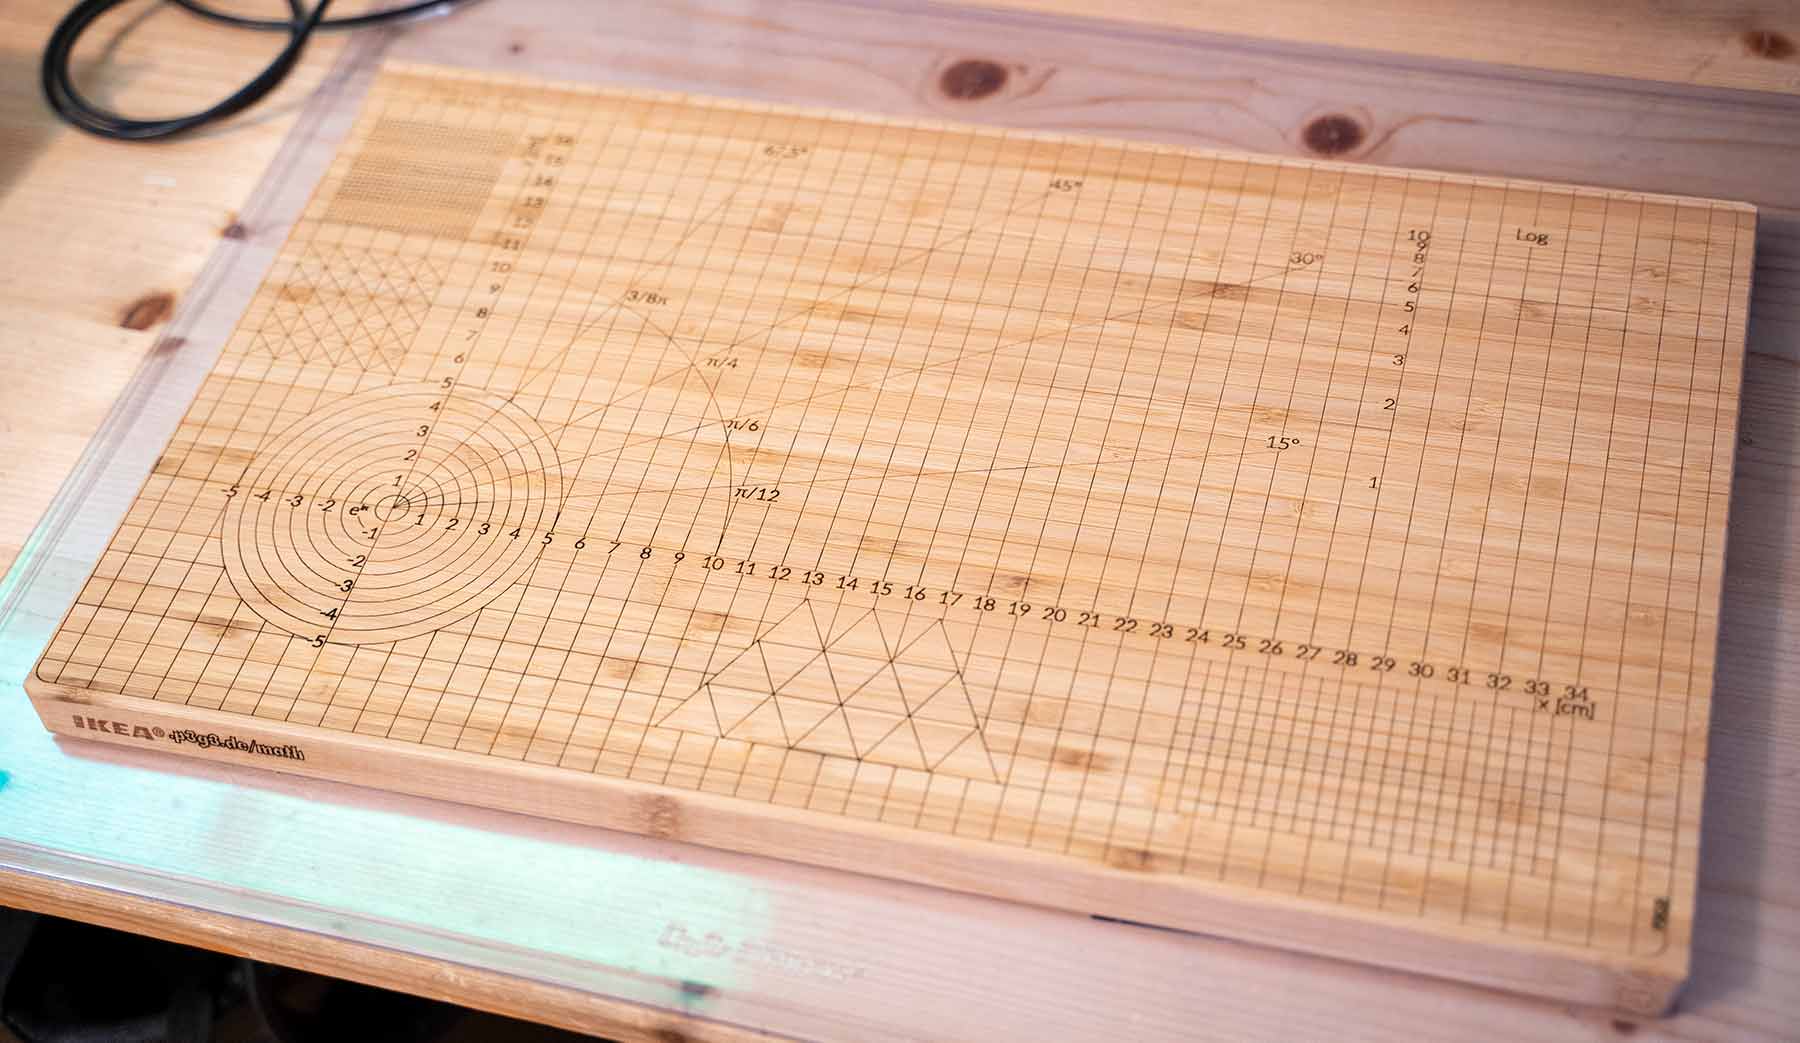
At the end of last week, I finally got to complete the project: I was able to use a laser cutter to actually burn what I'd seen in Illustrator into wood. More on that in this section:
And now make it permanent
When I finally got access to a laser cutter last week, the project could move from theory into practice. For the laser configuration, I had to make a bit of an educated guess with the settings: I chose 100% speed and 100% power, aiming for a permanent burn result. 100% power corresponds to around 40 watts of tube power at the laser, focused to a beam diameter of just a few micrometers. With a wavelength of 10.6 µm, the laser lies in the far infrared range, so the bright spot in the following video is only the effect of the laser: the wood rapidly vaporizes at the surface, and the heated particles emit visible light. (Though that shouldn't suggest that a laser of this strength is harmless: without the protective glass, which is not permeable to infrared light, blindness within milliseconds would most likely be unavoidable.)
https://p3g3.de/content/media/2026/04/mathboard-laser.mp4
Ganz schön rauchig: Das Einbrennen des Musters in das Bambus-Holz
The fact that I didn't succumb to smoke inhalation is almost a miracle: rarely has a wood produced so much smoke; even through the otherwise sealed exhaust construction, a very strong smell of smoke could be noticed. Without this filter system with outside exhaust, the 13-minute marking process could not have been carried out.
13 minutes of lasering? That's 780 seconds in America!
There were still two problems with the project that I wanted to address before finishing it:
- The processing time for the cutting board is around 13 minutes. Including clamping the board itself, focusing the laser, and setting the zero point, you have to plan for at least 20-25 minutes per board.
- Not everyone has room for such a huge cutting board; nearly half a meter in length is hard to accommodate in many apartments.
That's why I decided to make a smaller version of the cutting board as well. Thankfully, Ikea offers a smaller Aptitlig board as part of its range.
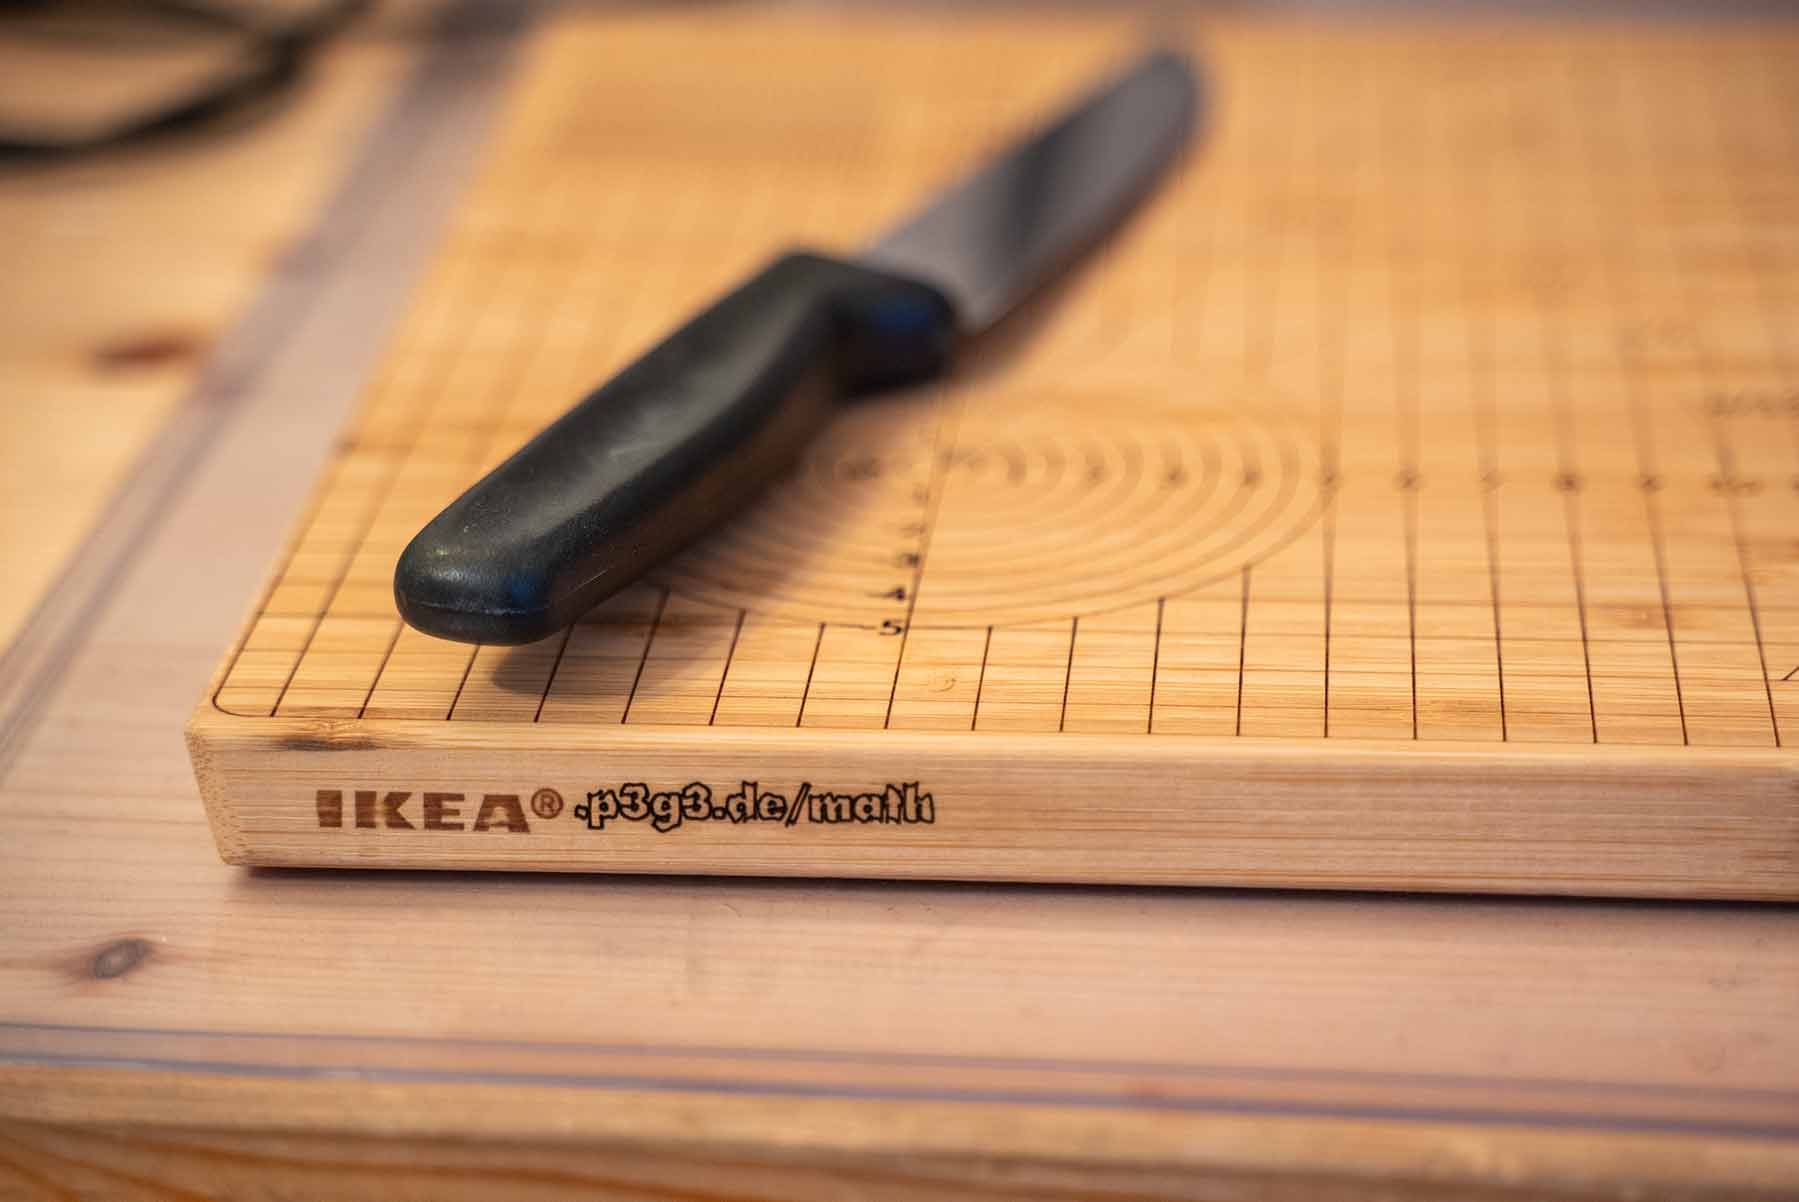
A short time later, the vector file for the mini Mathboard was ready too: on 24 x 15 cm, I managed to fit in nearly all the elements of its bigger brother in scaled form; only the logarithmic scale had to go due to lack of space. Then it was time to wait and laser again, though I also came up with one last gimmick: I wanted to add something on the side next to the Ikea lettering, and I present: p3g3.de/math
The result: a photo gallery

Back Next
Last but not least, as always I’m making the project files available (here as .ai source file and .svg vector file), and I’d be happy to get feedback on them. The name at the top still needs to be adjusted, but otherwise everything should already be correct.